


Making knights armor
Playing around in the middle ages this week Calvin has been on a knights quest. The instigator was a book called King Arthur's Knight Quest, which I picked up a while back at our library book sale. It's a hidden pictures kind of book and on his quest he's been finding the armor he'll need to rescue all of King Arthur's favorite knights. It's been fun, especially since he decided that finding the armor in the book wasn't enough and decided to make his own.
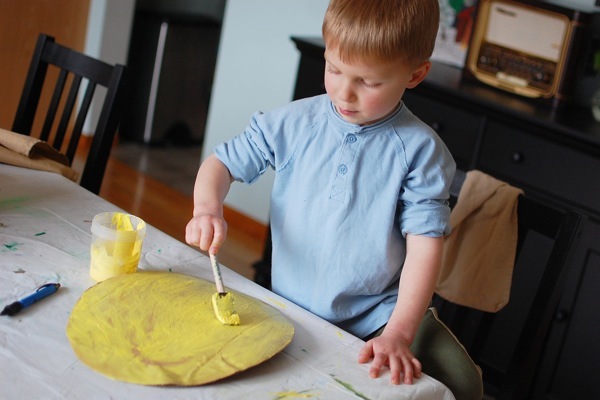
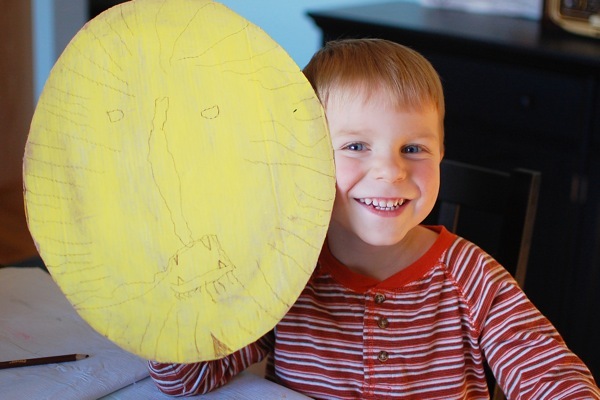
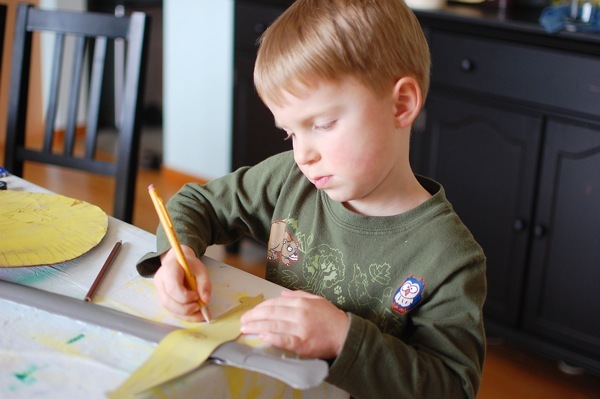
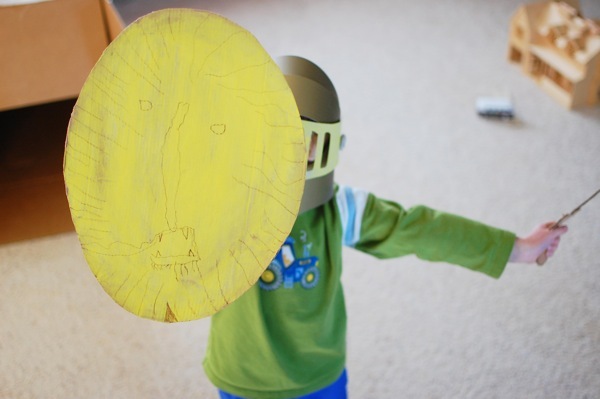
We started with a shield, which is merely an oval cut from corrugated cardboard. He painted and decorated it, then I added another strip of cardboard to the back, secured with hot glue, to act as the handle.
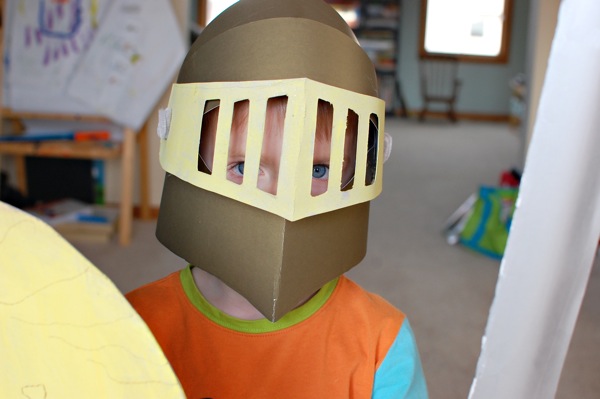
The helmet came next. This was a doozy of a project. Basic instructions came from the Usborne Knights and Castles activity book, but our first attempt at the helmet didn't go so well and we ended up scratching the job and starting over again the next day with some of our own ideas.
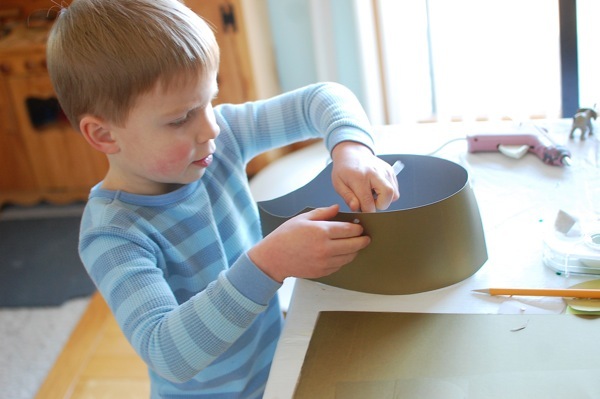
I used a measuring tape to measure around his nose to the back of his head then we marked and cut a strip of posterboard to length, plus an inch for overlap, and 3.5 inches thick.
We folded it in half and Calvin punched a hole, through both sides, about a half inch in from the long edge and almost halfway along the length. I then marked two cutting lines along the folded strip: a line starting at the bottom corner of the folded edge and arcing up to an inch from the bottom and finishing straight along the length, and another line staring about a half inch from the top corner of the folded edge and arcing smoothly up to the top edge. Calvin cut these out and they became the pointed tip at his chin and the slight dip below his eyes.
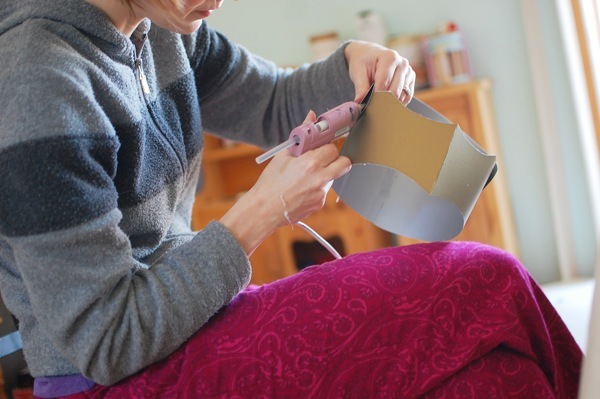
After the cuts were made we opened the strip and glued it together in the back, gluing the overlap front to back.
We used the tape measure again to measure the length in the back between the two holes, then cut out seven strips of that length plus one inch, six at two inches wide and one at four inches wide, and rounded at the ends. We punched holes in each strip, a half inch from the ends. We added the two inch strips to the helmet one at a time, lining up the holes to the ones on the helmet and tilting the strips until the bottom edge just touched the top edge of the strip below. Calvin held each strip in place while I hot glued it around the hole.
Calvin cam:
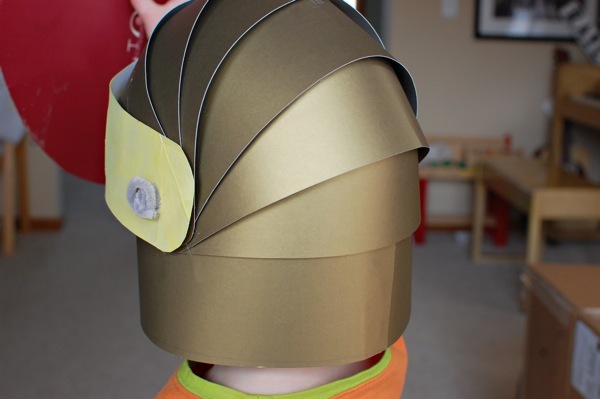
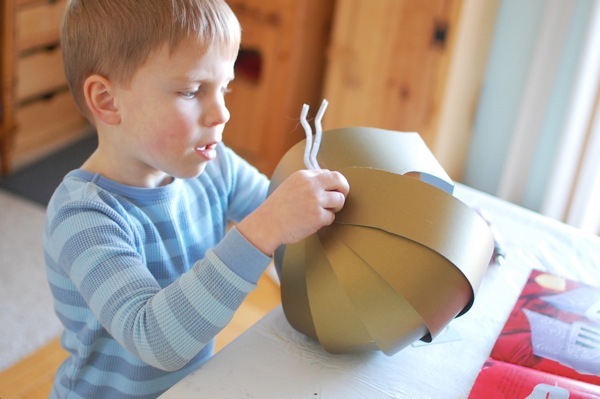
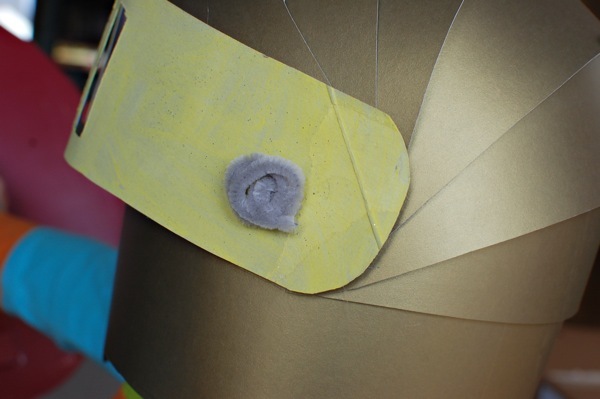
For the face mask we folded the four inch strip in half and drew the slits, then I cut them with a box cutter. Calvin then threaded silver colored pipe cleaners through the holes on the helmet, glued them on the inside, then threaded the face mask onto them on the outside and coiled the end of the pipe cleaners to hold them in place. This way the face mask can be raised and lowered.
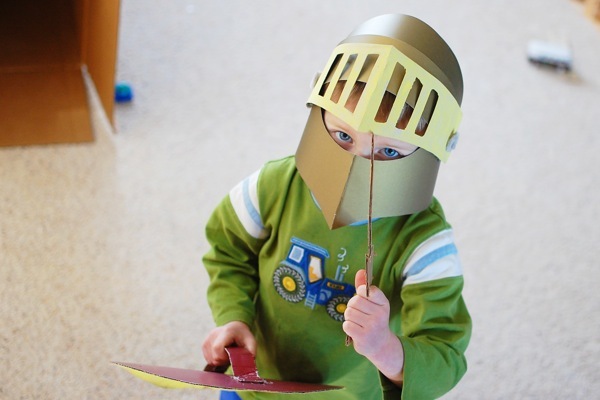
The sword was made with the remainder of the gold poster board, which was silver on the other side. Calvin traced the shape then cut it out twice. I cut a long, thin strip of heavy cardboard and we glued it to the insides of the sword shapes, lining them up. We then glued all the way around the edges of the sword, and Calvin traced and cut out a hand guard using more of the leftover pieces. He decorated it to match the shield.
We still haven't worked out a way to make armor just yet, but if we do we'll be back.
 History | tagged
Reader Comments (1)
cheers,
Nikole